SailNet Community banner
  • SailNet is a forum community dedicated to Sailing enthusiasts. Come join the discussion about sailing, modifications, classifieds, troubleshooting, repairs, reviews, maintenance, and more!

need to do seacock and through hull

4.6K views 14 replies 10 participants last post by  casey1999  
#1 ·
Im just reading up on how to do this and came across this thread.
Installing A Seacock & Thru-Hull Fitting In A New Location Photo Gallery by Compass Marine How To at pbase.com

i just dont under stand one thing and that is bolting the seacock through the backing panel

some sites say to go throught the hull or just the backing plate

see image 5

i dont want to make more holes in my boat so does the machined screws just get countersunk on the back of the backing plate then epoxied in?

How thick does the backing plate have to be ?
 
#2 ·
I started a thread after I finished mine, going by Maine Sail's instructions:

Notes on a thru-hull replacement

I drilled right through the hull for the machine screws. Yeah, it's three more holes in the boat, but everything is gooped up and sealed. It's worked great on mine.

I think the instructions say 1/2" backing plate, but since I have a smaller and presumably thinner boat, I went with 3/8". The G10 is incredibly strong, and I have no doubt that the thru-hull with backing plate is by far the strongest place on my boat…

It was my first boat project of any kind and I was intimidated, but it all went well. Think things through, dry fit, think things through again :)
 
#3 ·
i dont want to make more holes in my boat so does the machined screws just get countersunk on the back of the backing plate then epoxied in?

How thick does the backing plate have to be ?
The machine screws definitely go through the hull. Countersink enough so you have room to epoxy over the heads.

The thickness is driven by two things: 1. thick enough so when you make it fit the curvature of the hull the edges won't fracture and 2. thick enough to carry the structural load around the hole and orthogonal loads from the seacock into the hull. Practically speaking 1/2" is usually fine as long as the edges aren't less than 1/4". If it's a really large diameter seacock you might go thicker yet.
 
#5 ·
Just replaced 4 of my "through hulls with valves" with Marelon seacocks. Guided by Mainesail with modifications. I used 1/2 G10 epoxied to the interior hull. Machine screws from the inside fasten the seacocks into the G10 (tapped). No through bolting of the seacocks.

Six10 or equivalent to slurry the G10 to the hull.

Pic of the dry fit ...
 

Attachments

#11 ·
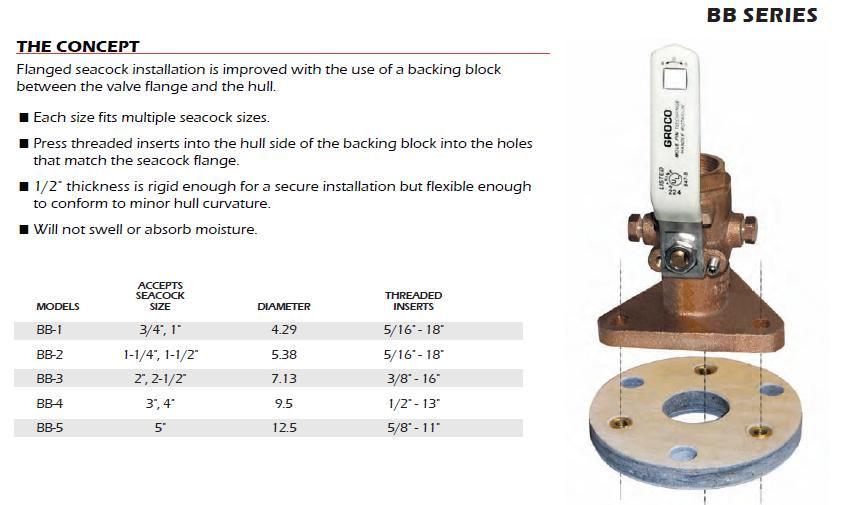
We used a Groco backing plate, thru hull, and ball valve for the sink drain this spring, did not drill through the hull, we used recessed anchor nuts in the backing plate, splashed last week and we still float.
 
#9 ·
I can't find anyplace online that sells the Groco backing plates.

They *should* be easy to make, but... G10 is so hard I ended up burning out the motor of my drill press when cutting it. Ah well.
 
#13 ·
I also used the groco backing blocks this year for our new through hulls. I believe the hole pattern also fits Apollo seacocks.

The backing blocks made the job really easy. I hate grinding/cutting/drilling fiberglass so the slight expense was worth it for me. Just be very careful of lining everything up while the epoxy sets (you get one shot) and makes sure you install the right way round (the bolt holes are bronze fittings pressed in, upside down they will pull out)

I simply google searched "groco backing block" and bought them from a chandler in Florida. Pricey shipping to Canada but great folks and they carry all the hard-to-find bronze bits like street elbows, hose barbs etc... PM me for details.

Novic
 
#14 ·
I installed a groco and a few spartan sea cocks some with bolting through the hull and some with stainless lag screws into the blocking. They were the same lag screws from the original Wilcox Crittenden sea cocks. It's my limited under standing the screws keep it from twisting,