BEAM ME UP SHIPWRECK!!!
Sorry, I was out doing a charter... So, anyway, I'm a lot more boat-savvy than computer-savvy. I can email pictures--but I'm not sure how I put them on here... I'll try to be descriptive.
How I did it...
1. Beam removal:
A. To take the load off the compression post, I lowered the mast using the boom as cantilever--I'm sure you know the drill.
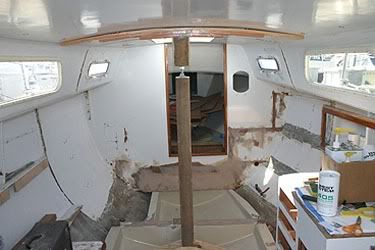
B. Then, I removed the sliding door, it's wooden slider from the floor, and the wooden starboard stow-space panel to allow full access to the fiberglass sole (My new boat didn't have a toilet installed, so no removal necessary there).
C. Using one of those handy-dandy Harbor Freight Oscillating Tools and a shop-vac I cut out the sole along lines that would be completely hidden when I re-installed the door slider-thingy (hmm is that the proper term?)--in other words, within an inch of the bulkhead.
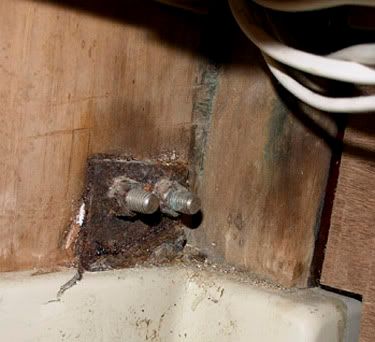
D. Using a block and tackle rigged to the downed mast through the hatch I was able to break the sole free of it's polyester bond to the hull (it was only bonded in a few blobs). And there she was--that blasted beam--rusted through and through.
E. I opened up the port settee and cut-&-vac'ed enough of the sole away from the tabs to allow my handy-dandy Harbor Freights 3" grinder space to cut the steel without throwing any fiberglass dust about (I was living aboard as I was working and, obviously, could not stand fiberglass dust)
F. For the starboard tab, I used the oscillator to cut away just enough of the bulkhead to allow it to escape intact.
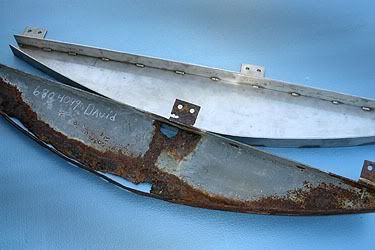
G. Then, out came the handy-dandy Harbor Freights 3" grinder. I cut off the central and port tabs and then cut the beam in half. At that point, removal wasn't much more of a challenge.
2. Beam replacement.
A. Instead of paying out the wazzooo for a custom made marine grade stainless steel beam, I decided to rely on time-tested, tried-and-true, old-(and new)-fashioned boat building methods... I only paid out the wazzooo for a bit of 1/4" marine grade stainless steel L-Bar and a few extended-lengthed tabs to be thru-bolted to it all, totalling under $200. (NOTE: One of the tabs was super-extended to account for the starboard bulkhead attachment being only lag-screwed, and, thus, requiring additional fastener points for added strength)
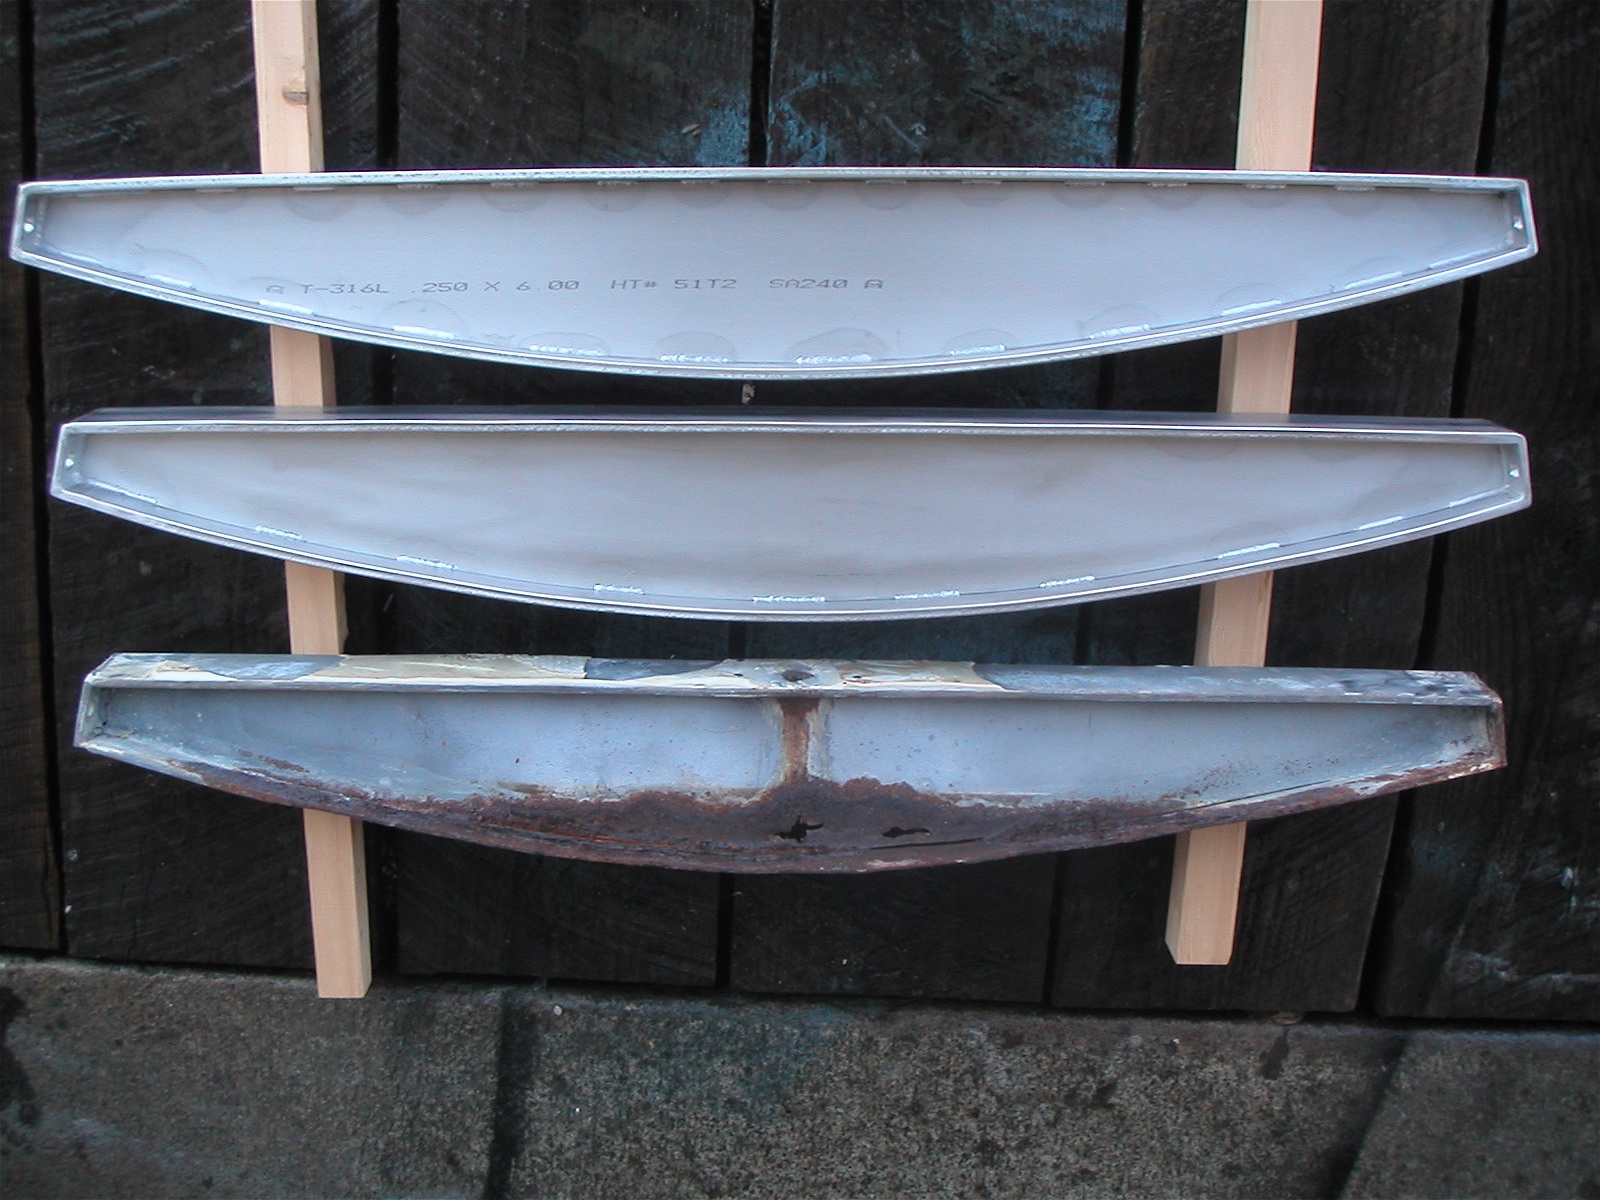
B. I traced the beam (minus all three tabs) onto two planks of Douglass Fir and cut them out. I cut them a little smaller in overall size to account/allow for the impending encasement in glass. In addition, I cut them 1/4" short (meaning from top to bottom--not side to side) to allow for the eventual addition of the L-Bar across the top. And, if for naught but a tribute to how things should have been, I cut a 1.5" arch out of the centers of their bottoms to allow for the inevitable icebox drainage to flow freely to the bilge.
C. I drilled them for bolting.
D. Then, I bolted the two together with counter-sunk heavy duty marine grade stainless steel bolts, sandwiching between them a laminate of mat, roving, and polyester resin (I'm still a big fan of polyester--yes, yes, I know Epoxy is better in every way [except price], but polyester has worked well in boat-building for decades and, well, as cool as titanium hammers are, I still use steel.)
E. I encased the entire beam--stainless bolts and all--in a heavy layer of glass matt & roving.
F. I then fitted the L-Bar to the top of the beam and drilled two holes in the central and port tabs, through the L-Bar and through the beam for eventual heavy-duty-marine-grade-stainless-steel bolt assembly.
G. I sealed all 4 holes in the beam with polyester resin and now had a completely water-proof beam complete L-Bar reinforcement and all but the starboard tab.
3. Fitting. (before preparing the starboard tab, which would now be on the forward side of the bulkhead, some fit-work was in order)
A. To account for some 40 years of compression and material memory and to reset to allow for another 40, I used a car-jack directly under the compression post to lift the sole, and thus the post, and thus the deck by around 1/3" or so. With the sole raised, I hammered a few sacrificial 2"-square chunks of cheap particle board underneath on both starboard and port sides to maintain the new height for fitting and installation (eventually, under compression and with exposure to excessive moisture they would crush and erode away)
B. I faired the hull from where the former beam had been semi-glassed in
C. Under the settee, I lag-screwed on fiberglassed 9"x9" plywood backing plates over where the previous tabs had been and sealed them with polyurethane (5200). Then I drilled for the new tabs
D. On the forward side of the starboard bulkhead, I also lag-screwed and 52'd a backing plate.
E. I masked the hull under where the beam would lay then bolted the new tabs in place and temporarily assembled the entire beam (tabs-to-L-Bar-to-beam) to check fit.
E. Using single strips of finishing cloth, I glassed the bottom of the beam to the masked hull so that, upon removal, I would have an accurate depiction of where my beam needed filled in with more glass for a snug fit.
F. I marked the starboard backing plate on the beam
G. Removing the beam and L-Bar, and using the thin finishing cloth markers, I filled in more glass for a snug fit
H. I cut a slice into the starboard side of the beam and L-Bar allowing for the third and final extra-large tab to slide in. Then I drilled through the beam, the tab, more beam, and the L-Bar for bolting.
I. I sealed the beam with polyester.
J. Then, I bolted the starboard tab in place--sandwiched within the beam and thru-bolted to the L-Bar.
4. Assembly/Reinstallation
A. From there, well, you can surely figure out the rest... Hammer the beam & L-Bar back in with a rubber mallet. Bolt them in place to the central and port-side tabs (thoroughly sealing all bolt-holes in the process, of course) and lag-screwing the starboard tab in place (mind you, here I did use epoxy to seal the screw-to-wood-bonds from corrosion).
B. Put the mast back up
C. Glass the floor back down (I waited 2 months for this, just so I could thoroughly check my work through some rough sailing before semi-permanently hiding it away from sight) again with Polyester (come on, nothing on a boat is final until you sell it or it sinks! Epoxy is wonderful and all, but it is not the answer to every question [and, while we're on the topic, neither is 5200!!!]--besides, that's how they glassed it down originally). Fair.
C. Reinstall all wood
D. Put in a head
Ta Da!
(It's 4:42AM... I gotta go to bed)
-Shipwreck